When we brought this house we knew there would be the inevitable arguments between the two daughters about who got the small bedroom – our solution to this (on hindsight maybe it was a bit drastic) was that as the smallest room had the loft hatch in it, that who ever went with that room, we would somehow convert the loft space for them so that they could use this space too.
Fast foward 1 year into living here and what had originally started out as creating a den style, chill space; that would be accessed by the original loft ladder, had somehow evolved in my head into a full blown ceiling out, mezzanine bed level jobby (yeah the husband loves it when that happens). And you know what it’s like once you get an idea in your head.
Now quick disclaimer before I write anymore about this space. In case this inspires you to create something similar please ensure you have someone check any structural changes you are going to be making or think you may need to make and whether you will need any building regulations before you start any work. We checked and didn’t need any as we weren’t making any structural changes. We also always knew the new mezzanine space could never be classed as an actual ‘room’ due to fire regs etc.
Anyway, I digress. So the work finally began one snowy day in the middle of the Beast from the East storm. We started off by cutting out part of the ceilings plasterboard and although this meant starting with one of the messiest jobs first, it was necessary for us to be able to get the loft boarding for the floor and the large sheets of plasterboard for the walls up to the loft level. The bonus for me was that it also gave us the sneakiest hint of what the space would look like once the ceiling was finally fully opened up.
Mezzanine roof ceiling
mezz 1
loft ladder
mezz progress
The loft space was completely un-boarded with bare wall joists and insulation everywhere! (Never let it be said that these new builds aren’t energy efficient!). Whilst the boarding of the floors was a fairly quick job which was pretty much finished in a day, the plaster boarding and subsequent joining, filling and rubbing down, took an absolute age. The husband (rather conveniently if you ask me) put his back out around this point, so to keep the project moving forward the rubbing down or every plasterboard joint including the ceiling became my job… In the summer of 2018. Yes, that summer! There were those days and days of gorgeously hot sunshine and where was I, stuck up in a hot and sweaty loft. All I will say on the matter is GET A PLASTERER IN!
Anyway, once the walls were all filled and sanded and we were able to paint them, it all suddenly felt like it was beginning to come together! We added skirting and then painted everything white to keep the space as bright as possible as there are no windows up here. We also chose a light coloured flooring for the same reason (more on the flooring later…)
Once we had done as much as we could in the upstairs level it was time to turn our attention to getting the rest of the ceiling on the other side of the room taken down. I was so looking forward to this (yep, madness considering the shed load of mess it was going to make!) as for months I’d been trying to picture just how the room would look to suddenly have open and high vaulted ceilings.
We knew we were going to have to keep a large structural ceiling beam in place but unfortunately this was pretty ugly and damaged (and not in a nice rustic way!) So the solution was to cover the beam with strips of chunky wood which we cut to size and fitted around to the beam and then waxed, to create a modern rustic look.
BEAM BEFORE
BEAM AFTER
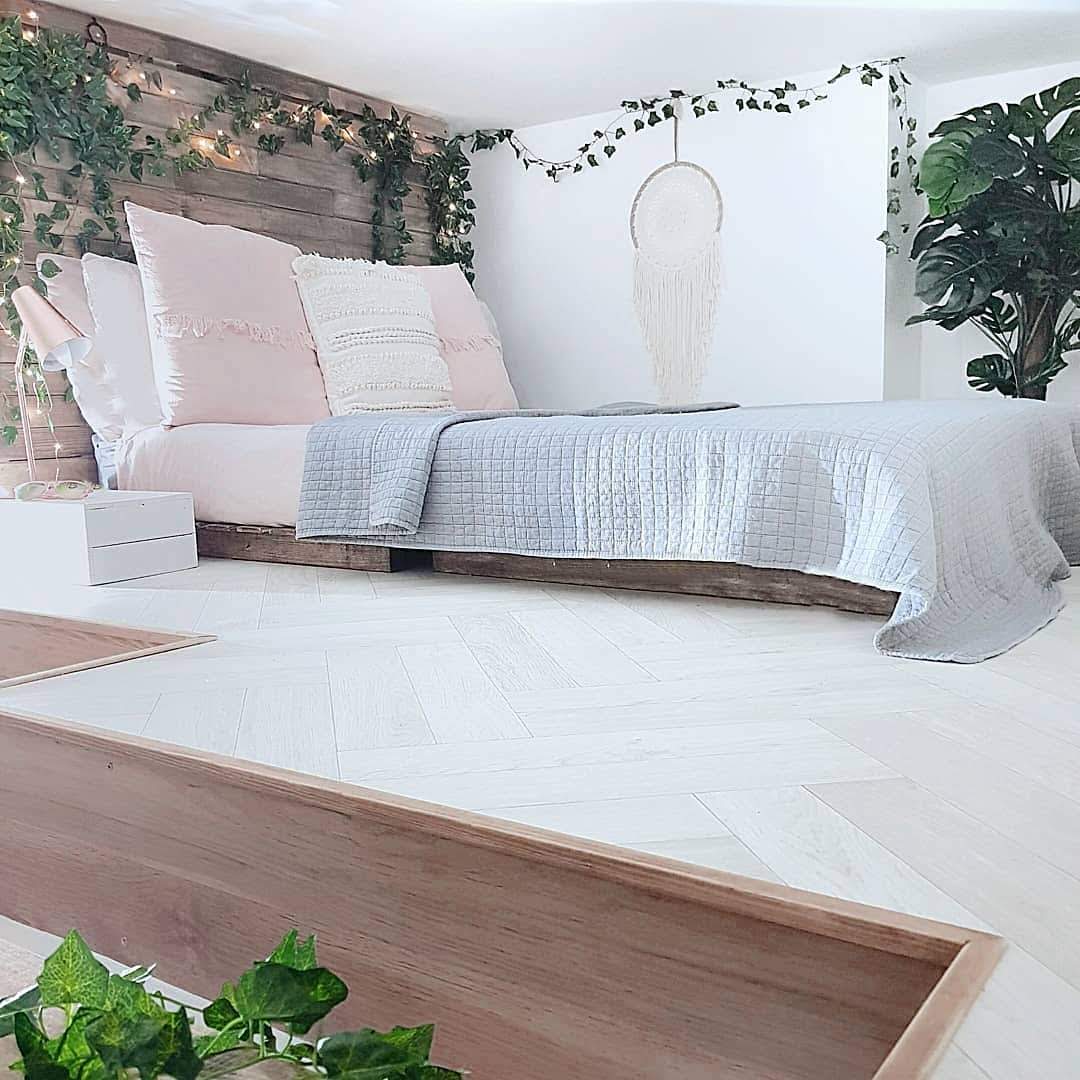
Knowing we had to keep this beam and the industrial feel it created, is also what inspired my decor for the rest of the room. I wanted to go for a rustic, modern boho vibe and this so happened to tie in perfectly with the fact that we were going to need a low, floor level bed (due to the restricted height of the ceiling) I feel a low bed always creates an instant boho vibe anyway. We made the bed and oversized rustic headboard ourselves from new pine and then I just stained it with lots of different stains and wax finishes to try and give the wood an aged look.
I’ve had a lot of messages about the flooring we used and it’s actually just vinyl with a herringbone pattern. After being unavailable for ages the one we ordered from eBay is now back in stock and so I’ve pasted a link to it here and it was in the colour and pattern ‘summer parquet’.
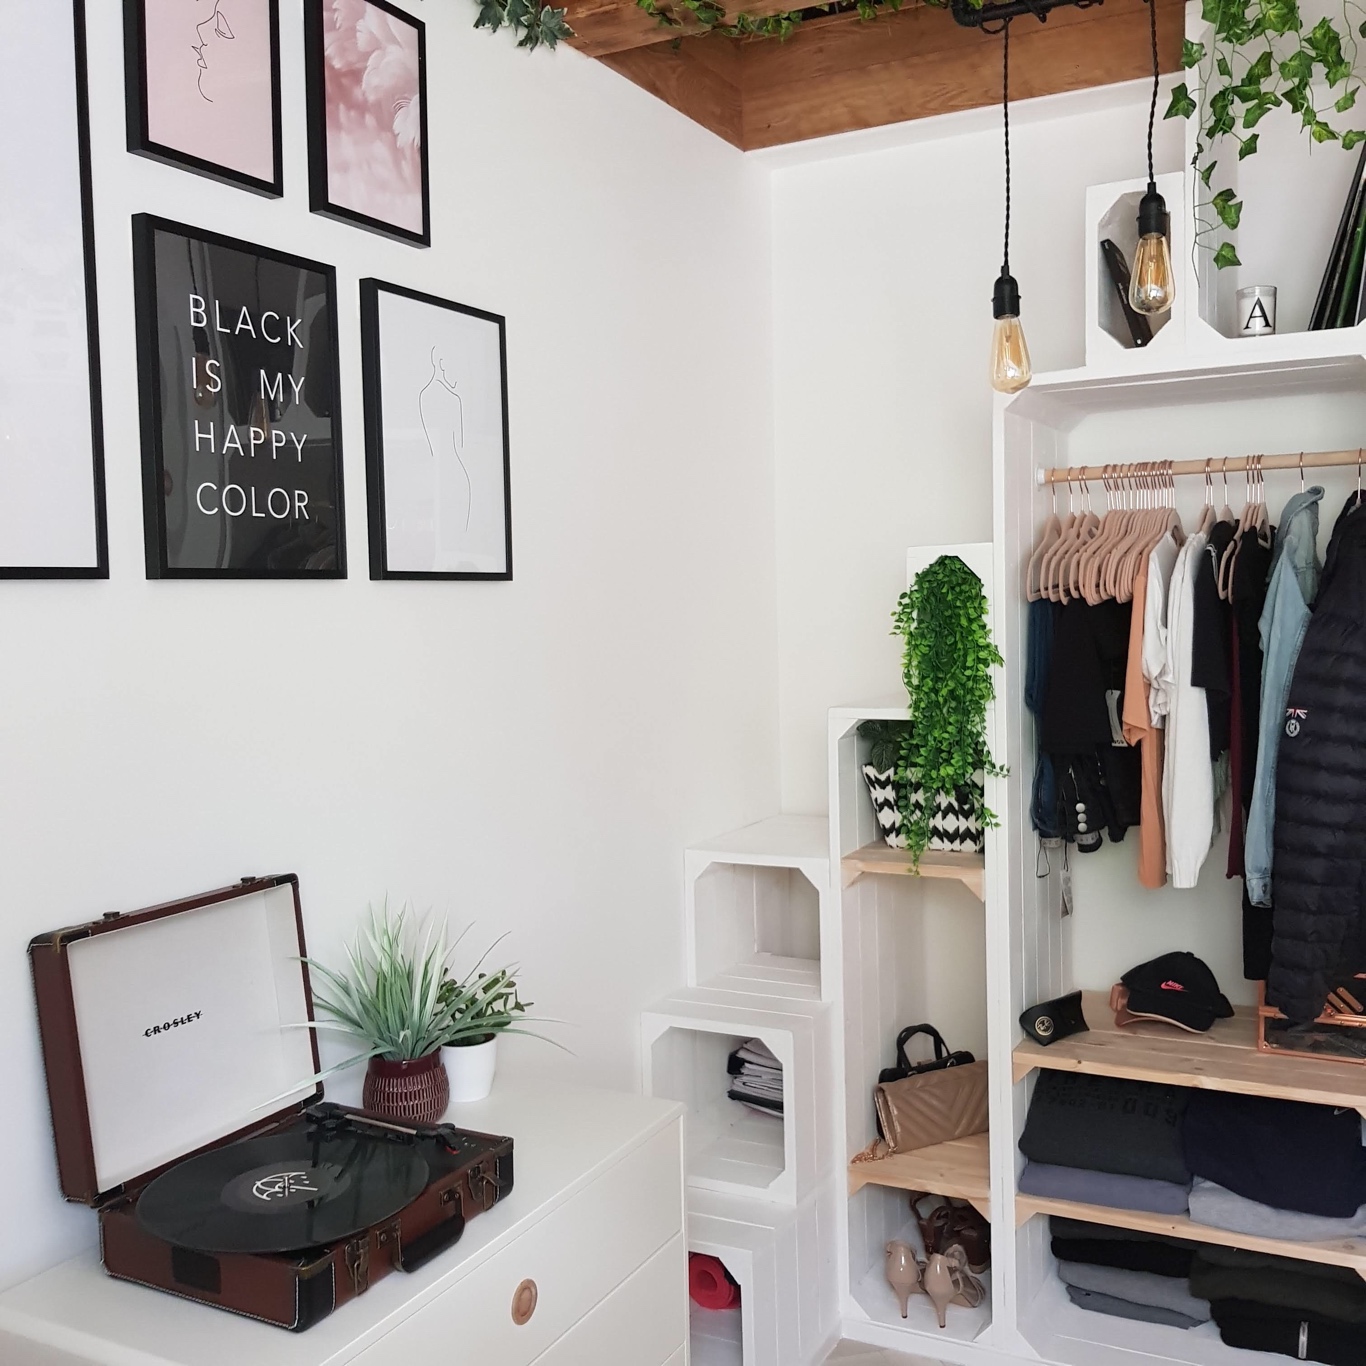
The next solution we had to come up with was the best way to get up to the top level. We originally made a wide, ‘wooden ladder’ style staircase but this ended up taking up way too much room in the downstairs space without adding any storage so we had to have a re-think… hence the crate stairs were born!
We firstly measured and tested (and then re-measured and re-tested) the crate sizes needed to create a staircase effect. We then made the crates, screwed them together, painted them with a white eggshell paint and added skirting to the front to create a more ‘fitted’ look. The top of these then not only became the staircase up to the mezzanine level but the inside of them became the wardrobe and handy storage shelves. Clever huh!
After around 4 months since starting on this room we were now FINALLY on to my favourite part… adding the furniture, lighting and the finishing touches.
We wanted the lighting to fall from the beam to truly make it a feature of the room and decided on this wrap around light from Iconic lights Its the Luiggi Steampunk wrap over which as I type is currently on offer for an amazing £33!
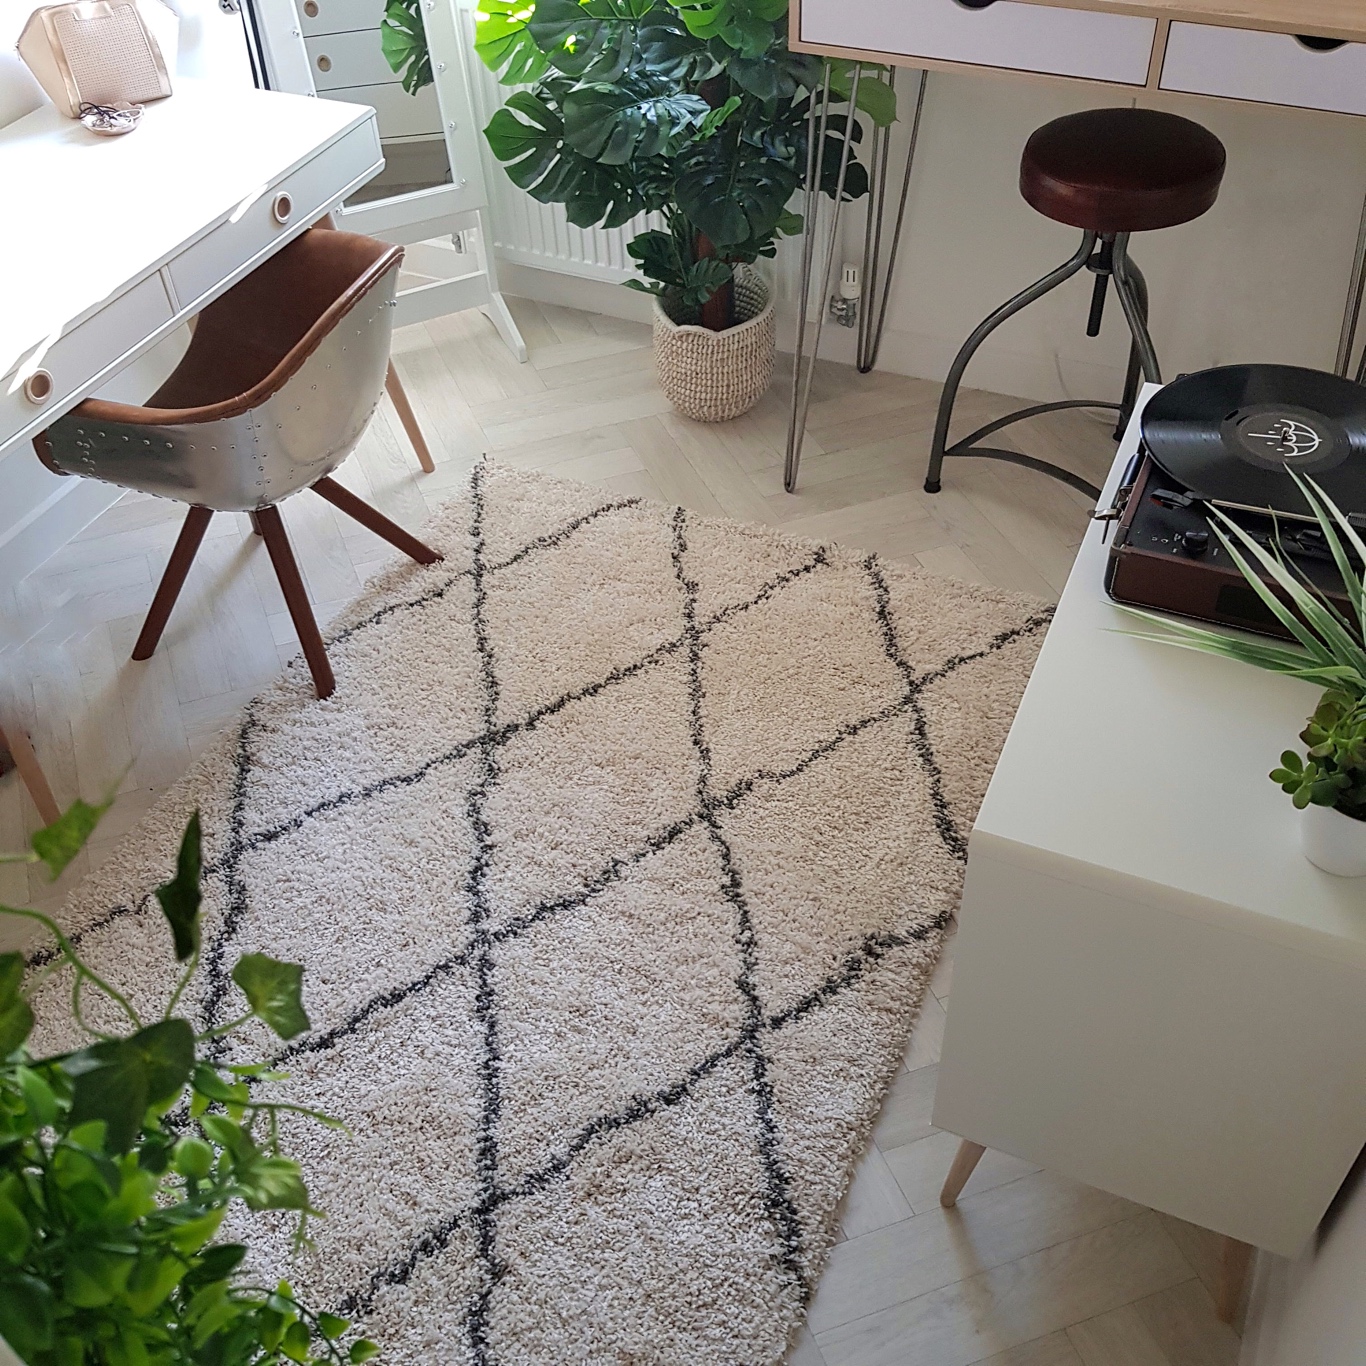
The rug is honestly the thickest, fluffiest rug I have ever known and I love it! It’s from Modern Rugs and I think such a reasonable price (£99) for the quality. This cream version is now discontinued but I have pasted a link here to the grey one and they also have so many other gorgeous, similar options!
The two desks (one is being used as a dressing table) were both from Amazon along with the chest of drawers. The ‘dressing table’ and the set of drawers are part of the same range which I have pasted a link to for you here: Dressing table (desk) and the drawers here.
scandi decor bedroom
dressing table
The desk (see image below) was also from Amazon and a bit of a bargain, but I wasn’t a massive fan of the legs so we changed these for some hairpin ones which I think work really well.
This gorgeous teal velvet chair is from Perch Living and the prints were from Desenio.
And I think that is about that! We finished the room in July 2018 and I’m still faffing about in here – I’ve not even finished adding those Dalmation wall stickers yet! You can also view a full video tour of this room on our daughters YouTube channel here
As always, thanks for reading and I hope this may inspire you to revamp some small spaces or redundant areas in your home. Let me know if it does!
Jo xx
*This post includes some affiliate links and gifted items.